As promised, here is my attempt at a tutorial. There are several other postcard tutorials out there on the net, but I've tweaked them a bit to make what works for me. If you make a selvage postcard using these instructions, please let me know if you had any difficulty following the steps. And, of course, I'd love to see your final results! And if I can get it to work, I plan to make a PDF file available on my blog someday. Updated -- link to the PDF is on my blog's sidebar.
This tutorial is for non-commercial personal use ONLY. Feel free to share with others, but please give the author (me) credit. NO COMMERCIAL USE ALLOWED. Thanks.
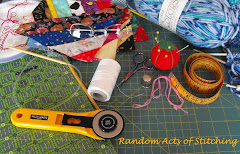
Supplies --
-- one 4 1/2" x 6 1/2" piece of white/cream fabric for the back of the postcard
-- one 4 1/2" x 6 1/2" piece of fusible fleece (fusible on one side only)
-- one 4 1/4" x 6 1/4" piece of fusible web (I used Heat 'n Bond Lite)
-- thread (at first I thought I'd use red, but changed my mind to pink after I had the selvages arranged)
-- permanent fabric marker
-- fabric selvages
__________________________________________

1. Center the fusible web on the wrong side of the white fabric and iron on. When cool, remove the paper backing. Set aside.
_________________________________________

2. On the fusible fleece (fusible side up), arrange the selvages the way you like, making sure to overlap the finished edge of a selvage on top of the unfinished edge of the previous selvage. Once you have decided on a design, with the iron gently fuse the selvages onto the fleece. This will help keep the selvages on while you sew them on the machine.
___________________________________________

3. Sew the selvages onto the fusible fleece, sewing very closely to the finished edge of each selvage strip. In this sample I used a straight stitch, but I've also used a small zigzag stitch at times.
___________________________________________

4. Trim the selvages to about 1/4" all the way around the fusible fleece. Discard the trimmed off pieces of selvage (unless they're long enough to be used in a future project).
___________________________________________

5. If your sewing machine has an alphabet stitch and you choose to embroider a message across the front of the postcard, press the unfinished edge of another selvage piece under (wrong sides together) 1/4" or so.
___________________________________________

6. Sew this selvage strip on, sewing very closely to the pressed edge. Here I've used a straight stitch, but a fancy stitch would look nice, too.
___________________________________________

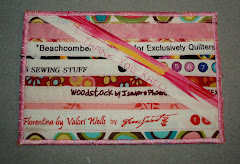
7. Stitch your message on this strip, making sure you don't start or finish too close to the edge (the card will be trimmed a bit later). You could also just stitch the message on one of the selvages already on the card if there is enough white space.
___________________________________________

8. Center the white fabric on the unfusible side of the fleece and fuse the pieces together. Let it cool.
___________________________________________

9. Trim the card to 4" x 6".
___________________________________________

10. Satin stitch all the way around the edges of the card.
___________________________________________

11. Using a permanent fabric marker, write "POSTCARD" on the top of the back side. Write your message and heat set the writing. (I usually add my personal label before I satin stitch around the edges).
___________________________________________
12. Add a FIRST CLASS STAMP (not a postcard stamp) and take it to the post office to be hand-cancelled. Don't let the clerk tell you it needs additional postage! I've sent these (from at least three different post offices) to Oregon, Connecticut, Florida, Idaho, North Carolina, and a number of other states, as well as locally with no problem at all.
___________________________________________
That's it. Have fun!


 Quilter Blogs & Store Search


