This is "K-7 Rose of Sharing", a beginner-level applique block and yes, I cheated on this one. In two ways, actually. I don't really care that I've cheated...remember, this is Anya's quilt and Anya will make it any way she darn pleases!
First...I did not want to applique 4 individual hearts and then sew them into one complete block, so I decided to make them as one big piece in the center. When I'm ready to quilt the entire quilt, I plan to stitch across the diagonal lines of the block so it will give the appearance of being sewn in 4 pieces. I've marked the quilting lines in chalk on the photo to show what I mean.

The other way I cheated is in using the invisible machine applique method. I had never attempted that technique before, but I'm always willing to try anything to save me from hand applique. I used monofilament thread in both the top and bobbin and sewed very carefully along the edge using a blind-hem stitch. That's where the machine takes four straight stitches and then one very small zig-zag stitch into the applique fabric.
I practiced on two scrap pieces of very ugly fabric in my stash and was amazed at the results. I showed it to a couple of fellow quilters and they couldn't see the stitching at all. Then when I first tried it on the batik fabric I am using for this quilt, however, it was a major disappointment. The needle of my sewing machine made holes that were way too big and noticeable in the dense batik. That meant a trip to buy some silk needles, hoping that they wouldn't make such large holes. The result is what you see in the photo. I still see holes, but it's not as noticeable as before and I'm certain that if I had hand appliqued this one, my stitches would surely show anyway.
I do plan on trying this method again; however, I will be sure to use a darker, busier background, hoping that the holes will be even less apparent.
Yeah...this is block #75! I believe that meets my goal of 75 blocks by the new year!

 I made this quilt in mid-2003 based on the Jewel Box pattern. It's just half-square triangles and four-patches, framed by a piano-key border. I bring it out every spring and summer for the master bedroom, but it gets put away and is replaced by a flannel quilt when the nights start getting chilly in the fall.


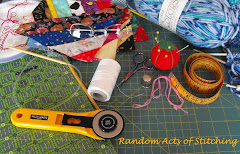
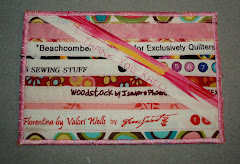
 Lately, almost nothing gets wasted in my sewing studio. These selvages were cut off from some Christmas fabric that I recently used for pillowcases and I'm now in the process of making them into something fun. But I can't show the results yet...maybe in a couple of weeks...


 Quilter Blogs & Store Search


