Thursday, February 14, 2013

I Just Couldn't Stop...

...until the top was finished...


Even my husband is impressed..."How do you figure out how to get all the light and dark fabrics to be in just the right places?"

Wednesday, February 13, 2013

Sometimes It's Just Not Worth It

I bought these birdhouse blocks at my guild's last yard sale, about six months ago...


Since my new year's resolution is to use what I have, I got these out a couple of weeks ago and started to play around with what to do with them. I didn't really care for how they looked in a traditional straight setting, so I decided to change them up a bit...

...so I got out my ruler and rotary cutter...


...and arranged them like this...


...but I didn't really like that either. It bothered me that the black circles were all placed a little bit differently on each birdhouse, so when they were cut in half and rearranged, the black half-circles ended up looking funny. I wish that they all had more of an "S" shape to them, but that wasn't going to happen.

So this is where they ended up....


Trash day was yesterday...

Monday, February 11, 2013

Peer Pressure


OK, so I succumbed to the peer pressure -- after seeing all of the gazillion other scrappy trip around the world quilts that everyone is making out in blogland, I decided to try to make a dent in my batik stash. So this is what I've been doing instead of cleaning up the dust bunnies in my house. So far, I've made 16 blocks and have plans for 8 more. I told myself it was OK to start another quilt top because I had just finished quilting another one that was in my UFO pile (I'll blog about that one at a later date). I expect to quilt this one quickly because it won't require any custom quilting -- the fabrics and design are way too busy, so I'll just do a quick meander and be done with it.

Now I have to go and finish the 8 remaining blocks....the dust bunnies can wait...

Friday, February 8, 2013

Helpful Hint


I often trim the edges of my quilt tops to square them up, which means that seams along the outside edges have their threads cut. And that means that those seams can easily start to come apart the more the quilt top is handled.

In order to prevent this, I try to make it a habit to sew a line of stay-stitching very close to the outer edge all around the entire quilt top, staying well within the quarter inch where the binding will be sewn on.

The photo below shows a sample of the stay stitching....


This does a good job in preventing the seams from coming apart as the quilt top is handled. And if it's done within that 1/4 inch seam allowance, it doesn't need to be picked out once the binding is sewn on.

Wednesday, February 6, 2013

KISSing


As I've mentioned in the past, I'm fortunate to belong to an art quilt challenge group with a few of my local quilting friends. For more than a year now, we have been challenging each other with a new project every three months or so. What you see in the above photo is my finished project for the latest challenge -- we were to use a letter or letters of the alphabet in our quilt. No other restrictions.

For the first several challenges, I stressed and worried about what I was going to do, but while working on the one from last time, I decided to just KISS it (Keep It Simple, Stupid). This whole experience is supposed to be fun and enjoyable, not something that keeps me up at night. So I continued with the KISS approach with this one as well.

I started with this....

....lots of scraps...

...even scraps that were already sewn together...


I then randomly placed about 5-7 layers of scraps on half of the wrong side of a piece of black fabric, about 12 x 25 inches...


I folded the other half over the scraps and sewed through all the layers in a pattern resembling the letter "V". Some of you may realize that this is basically the technique for making chenille...


I then started to cut through the top layer of black fabric using sharp scissors...


But I decided that I needed to cut through more layers of fabric in order to get more of an interesting design in the end...so I remembered that I had a chenille cutter somewhere in my sewing box....


That made things a lot easier and gave me the results that I wanted... 


But it needed one more step in order to get to what it looks like in the very first photo. I had to put in the washing machine and dryer..

And it came out just fine...and surprisingly, there were very few threads on my husband's underwear when I finished the load!

I call this piece "V Is For Victory", because I was victorious in completing this project without any complaining, whining, or stressing!

To see my previous challenge pieces, click here.

Monday, February 4, 2013

A Little Thank You


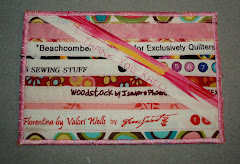
A couple of weeks ago, I blogged about winning some luscious fabric from Vicki of Field Trips in Fiber blog. In return, I made this very simple postcard for her from the selvages of all ten of her hand-dyed pieces that are now in my stash.

All I did was use my basic selvage postcard tutorial, put a first-class stamp on the back, and take it to the post office for delivery. And it showed up in her mailbox several days later...Vicki tells me that the postcard arrived in good shape.

Thank you, again, Vicki, for the great giveaway!

Friday, February 1, 2013

Use It Up!

After I made the two tops shown in yesterday's post, I went digging through my scraps and stash for pieces that could work for a backing for the larger one...and I found all of these....


...which turned into this...


Not particularly pretty, but it works. The small pieces on the bottom left are what's left of that mess in the top photo. They will be cut up for my leaders and enders.

It took longer to piece the back than the front (seen in yesterday's post)!

And I found the perfect fabric in my stash for the bindings...it's ready to go, too...